de vita sua
a blog
Getting images out of PDF files
by John D. Muccigrosso
Note: This now has a companion piece on getting images out of Office docs.
I spent a lot of time this past academic year getting scanned images out of other people’s PDF files. So much so that I wrote a few scripts to do it with a minimum of active intervention on my part. This post describes PDFs and a few of those scripts I wrote. It uses the command line a bit.
Portable Document Format (PDF)
PDF is a file format with a lot of flexibility, which isn’t the unalloyed good you might at first think. On the plus side, a lot of text-using applications will output PDF files that contain that text in a more or less “pure” form. (I’m going to skip a lot of the technical details here.) If you use a Mac, that’s what often happens when you “print” to PDF from, say, Word or OpenOffice.
Often though the format serves simply as a container into which images are dumped, often images of pages covered with text. This can happen if you scan the physical paper pages of a journal article, for example. A nice thing about these files is that it’s then possible to do OCR (“optical character recognition”) on those images and get text you can select and copy (a lot of JSTOR files are like this). Many document scanners offer this option.
But let’s leave all that aside. What I’m concerned with here are those PDF files that contain scanned images that are not text, but instead represent, say, a building plan or an image of a painting. You might have such a PDF file, but not the original book or article, so you can’t just go back to scan it into the format you want. You need to get it out of the PDF. So what to do?
Fortunately there are a number of free, command-line tools that you can use. I’ll assume here that you’ve got them on your computer already. (I’m a Mac guy and I install these mainly through Homebrew, but there are other options.)
What images?
The first thing to do when you have a PDF with some images that you want is to take a look at what it contains. For this the pdfimages function of the poppler tool set is perfect. This utility will give a nice listing of the images that are contained on each page of the PDF. Here’s the command:
pdfimages -list <filename>
The output looks something like this:
page   num  type   width height color comp bpc  enc interp  object ID x-ppi y-ppi size ratio
--------------------------------------------------------------------------------------------
   2     0 image     219    77  gray    1   8  image  no         4  0   151   151 6243B  37%
   2     1 image     176    29  gray    1   8  image  no         6  0   151   155 2437B  48%
   6     2 image     746   507  gray    1   8  image  no        24  0   151   151 64.9K  18%
   6     3 image     746   502  gray    1   8  image  no        26  0   151   151 54.1K  15%
   7     4 image     747   502  gray    1   8  image  no        30  0   151   151 55.5K  15%
   9     5 image     830   505  gray    1   8  jpeg   no        36  0   151   151 28.1K 6.9%
  11     6 image     396   227  gray    1   8  image  no        42  0   151   151 10.2K  12%
  11     7 image     396   225  gray    1   8  image  no        44  0   151   151 10.7K  12%
The headings are fairly easy to understand. (Go here for more info.) “Page” tells you which page of the PDF file has the image. You can see that this file doesn’t have an image on every page; it’s mostly actual text (not pictures of text). The next column numbers the images. Then you get the dimensions of each image, the colorspace it uses, how many components there are to the color (1 for these gray images), and how many bits are used to represent the colors. The next column tells you something about the format, but it’s not as informative as it might be: “jpeg” is good, but “image”? Let’s skip to the “-ppi” columns which tell you the resolution (pixels per inch) of the image, how big it is (in bytes or kilobytes of megabytes), and finallyv how compressed it is.
So, how do I get these images out of the file?
This will do it:
pdfimages <filename> <output file prefix>
Just like the last command, but take out the “-list” and provide a prefix for the output files. If we choose something obvious, like “output”, for that, then the command will produce files with names like “output-000.ppm”. The first part we chose in the command, next comes a counter that starts at “000”, and finally the file extension, which you might not recognize, “ppm”, which stands for “portable pix map”. pdfimages defaults to outputting an uncompressed file format which is basically a pixel map of the image. You’ve got a 100x100 pixel image? You get each of the 10,000 pixels defined in whatever colorspace the images uses. “.ppb” is used for “black and white”; and “.ppm” for gray and color. A little math for the first image on p. 2 above. It’s 219x77 pixels at 8 bits (1 byte) per color and uses 3 colors, so 219x77x3 = 50,600 bytes or 50.6kB. A black-and-white image of those dimensions would be one-third that size. (Note that even though the image is gray, pdfimges outputs it in a richer colorspace that takes up more room.)
What if we try that on the jpeg image on page 12? Well, it should be something like 830x505x3 = 1.26MB and it turns out to be 1.27MB (there’s some file overhead apparently; let’s ignore it). Note that in the image list above, that image was only 28.1kB and if we convert our ppm to a jpg, we get something in that range. (jpg files can be more or less compressed, so we’d be unlikely to get the identical file size.)
By the way, how did we selectively extract just the image on page 9? pdfimages has flags that you select a particular page range:
pdfimage -f <first-page> -l <last-page> <filename> <output file prefix>
So, “-f” for the first page and “-l” for the last.
To improve things a bit on the filesize front, pdfimages lets you preserve some (not all!) of the original image formats in the PDF. The easiest thing is just to preserve as many as possible by using the “-all” flag:
pdfimages -all <filename> <output file prefix>
Now we’ll get those jpg files back out, along with some others, in this case “png” files which are all about the same size as the original listing told us. There are some other formats that pdfimages can output, including a highly compressed black-and-white one called “ccitt” that you often see with scans of text; it’s a compression scheme used in files with a .tiff extension. And two other JPEG formats, JPEG2000 - “jpx” encoding, which is rare - and jbig - which is less rare, but under copyright and therefore harder to work with. It features really good compression for non-color images (like text), and is easy enough to read, but finding an app that will write it requires spending some money (which we’re trying to avoid here!) and therefore results in the use of other formats which produce larger files. If you find some jbig images, you may also see that the images are composed of more than one file (especially if they’re in color). In this case, you are likely better off not using the “-all” flag and just getting the big .ppm file to compress later.
Alternatively you can force output in a couple of formats, namely compressed png files or tiff files, by using “-png” or “-tiff” flags. Some other flags will cause pdfimages to output certain files in their original format: “-j” (for .jpg), “-jp2” (JPEG2000), “-jbig2”, and “-ccitt”. If you combine these, you can get, say, all the jpg files in their original format and everything else as a png.
Slicing
Now that you can get the images out of a PDF, there’s one more thing to worry about: slicing. In some cases PDF files are produced by applications that basically take a page and slice it into multiple, usually horizontal bands which are put into the PDF sequentially. When you use pdfimages on this kind of file, you get a series of images that will go together to recreate the original page, but aren’t of much use in their “sliced” format. To fix these, we’re going to use imagemagick, which I will again trust you to install on your own.
Let’s we’ve got a series of slices that have similar names, because you made them with pdfimage. Something like:
piece-000.png
piece-001.png
piece-002.png
piece-003.png
piece-004.png
imagemagick has a simple command that will re-stitch them, as it were:
magick piece-*.png -append whole.png
This will stick the piece images back together top to bottom. If that’s not right and they need to go together left to right, use “+” instead of “-“ before the “append”:
magick piece-*.png +append whole.png
Here’s a demonstration with imagemagick’s built-in image of a rose:
magick rose: rose: rose: -append toptobottomroses.png
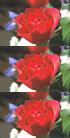
magick piece-*.png +append lefttorightroses.png

You’re likely going to need to edit the resulting image because it will be the entire page, not just the image you want.
(I’ve got a few other posts on using imagemagick. Follow the tags below!)
Save some time?
Because I use a Mac, it’s fairly easy to turn these into AppleScripts. Mine are are all posted in my github repository under “imagemagick” and “image extraction”. You’ll need to have poppler and imagemagick installed on your own for them to work, but they’re pretty handy. Append images.applescript will append the images that you drop on it, giving you a few options along the way. Get all PDF images.applescript will grab all the images from a PDF, when you’re lazy or don’t know what you need. Finally Get PDF images.applescript will let you select a range of pages to get the images from. The last two combine the flags mentioned above to preserve all but the jbig image format, which come out as png.
PS
This is a bit of a follow-up to my post on fixing scanned articles. I know a bit more about working with PDF files now, so the advice is a little different.
Tags - AppleScript - cli - imagemagick - pdf - poppler - scanning - technology