de vita sua
a blog
Fixing scanned articles
by John D. Muccigrosso
I’ve got a lot of scanned articles in my files. Many of them come from my grad school days (very, very, very early internet) when the only way to have your own copy of an article was to make it with the departmental copy machine. (I got pretty good at that, btw. Add it to the list of skills with rapidly diminishing returns.) Over the past few years, I’ve taken a good run at converting these dead-tree copies to digital ones, mainly by using one of the spiffy scanners my employer has bought. They can output the scans into a number of formats, and I chose PDF most of the time, figuring I could use one of the many PDF readers on my computer or iPod and share the files via Zotfile and Zotero. Turns out that was maybe not my best move.
Another source of scanned articles has been inter-library loan (ILL). It’s a great service, especially for those of us at small places without big research libraries, and recently has moved towards providing digital copies in place of paper, but you still sometimes get paper and their scans aren’t always the best either.
The challenge with most of the scans that I did and many of those that come via ILL is that the PDF files are basically convenient containers for image files. They may look like paged articles, but basically the PDFs are just packaging images in a way that enables you to have them associated with one another, and enables other apps to mark them up via highlighting or the addition of notes.
In essence the text in these images is not available as text, but just as pictures of the text. You can’t select it or copy it, even though you might be able to read it easily. This is just fine for many purposes, but if you like to get the text out of the articles or highlight it as text (instead of just drawing semitransparent yellow lines over it), it won’t do. It also means that your computer can’t scan the text in the file and return it when you do a search (as with Spotlight, for the Mac users).
It’s also the case that many of the copies that I made (and sometimes the ILL ones, too) are not of the highest quality. Sometimes the pages are a bit crooked or I’ve got two “real” pages on one scanned page, which saved paper, but doesn’t make for the best reading experience on a smaller screen.
So there are two things I’d like to do with these PDFs: first, clean them up a bit, possibly putting each individual page of the original on a digital page of its own, and second, make them into PDFs that embed the text. As it turns out, there are several command-line tools available for both of those steps, and they’re free. I’ve written some scripts to make the process a little easier, but here are the basic steps to follow.
Before I start though, let me note that there are a few other very helpful guides to doing much of this. ProfHacker has some great tips for creating and working with PDFs, for example, and Fred’s ImageMagick Scripts are a great resource for that software (including a text-cleaning script).
Steps
Before you do all the work on this, make sure that you actually have to. Many articles are available in one of the various scholarly repositories such as JSTOR or Project Muse (for humanists). Sometimes authors make their work available on-line, too, and if you can’t find something, you can always ask the author via email. In most (but not all) cases, the quality of the scans and the embedded text in those repositories is going to be much higher than your own work and if the PDFs are properly made, they’re going to be a lot smaller than any scan can be. I’d estimate that something like a third of my grad-school articles were available on-line.
You’re also going to need some software for this. I’m going to assume that you know—or can find out how—to install it. Here’s my list and how I got them on my MacBook:
- ImageMagick via Homebrew: this is powerful (if sometimes a little complicated) software for image manipulation.
- poppler via Homebrew: a set of tools for manipulating PDFs
- pdftk via pdflabs website: another tool for PDFs
- unpaper via GitHub: a script designed to process documents like the ones we’re talking about (but which has proved inadequate for me)
- tesseract via Homebrew: optical-character recognition software
- GraphicConverter 10: the latest iteration of a venerable Mac image-file application. A lot of what it can do can be handled by ImageMagick, but its use of the graphical interface makes it extremely handy for certain tasks.
In an ideal world, this process could be completely automated, but I find that when I was a bit, uh, sloppy with the scanning (or when it was hard to get a clean scan from a book), automated processes don’t work so well. As a result, I’ve split up the clean-up and OCR processes into different scripts, and I save the intermediate files along the way in case some step doesn’t work well and I need the older file (which has saved me on numerous occasions). I’ll describe the basic process first, and then give a link to my scripts which semi-automate the whole thing.
0. Scanning on your own?
In case you’re still doing some scanning on your own, a few suggestions. First, get to know your scanner. Many of them have some nice features built in, but not set by default, like noise reduction, bleed-through reduction (when the other side of the page is visible), the ability to set the file type and resolution, and so on. Second, if the file is just text, or text with black-and-white images or photos, save the file as a grayscale multi-page TIFF (or PNG, but that’s usually not an option). JPEG format will get you much smaller sizes, but at the expense of image quality and you’ll want that for the OCR step of the process. If you’re really lucky, your scanner will come equipped to do the OCR for you. My experience is that those can be very good quality, but since they package everything up as a PDF, you may get poorer image quality. Experiment. The better your original scans are, the easier the rest of the process is.
For those files or scans you already have…
1. Get the images out of the PDF.
I’m assuming here that you are working with a PDF that is just a container for these images, such as is produced by a basic document scanner.
The best tool for this is poppler’s pdfimages which will take each page of the PDF and create a separate image file for it. In most cases these will be gray-scale or even black-and-white. This will depend on the settings of the scanner.
pdfimages -list <PDF filename> will produce a page-by-page list of images in the PDF, if you’re curious, but otherwise do a pdfimages <PDF_filename> <output_filename> and it will create a series of files, one per page, named “output_filename-000.ppm” and increment the 000 for each file/page. ppm is an uncompressed filetype for color images. If your PDFs are not in color (as is likely) you will get a pgm file (for gray) or a pbm file (for black and white).
If you do have a PDF that contains pages with multiple images (and pdfimages -list will show you that; see the screenshot in the figure), you can use ImageMagick to generate images from the PDF: convert -density 300 -alpha off input.PDF output_%03d.png. This does modify the images that may already be in the PDF, but you don’t have a lot of choice at this point. Fortunately I find that very few of my files fall into this category.
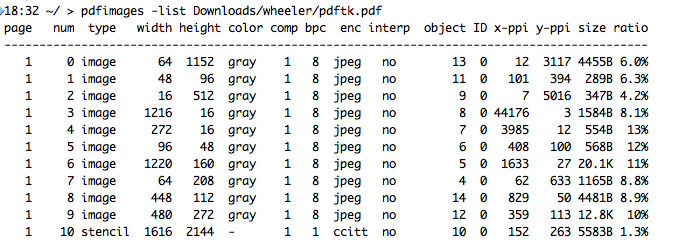
(Image by John D. Muccigrosso CC BY-NC-SA 4.0)
2. Split the pages
If your document has two physical pages to the image (i.e., it was scanned “2-up”), as often happens with scans of books, you might want to split those into single images. For this I use unpaper. It will attempt to split the double page into two separate pages, and, depending on the quality of your scan, it will be better or worse at this. Sometimes a quick manual clean-up of the original image will improve its performance significantly, so if one out of ten images is improperly processed, I just fix that one and re-apply unpaper to it alone. The new pages are also centered and straightened out by unpaper.
3. Clean up the images
You might want some clean-up for your single-page images, especially if there are any borders showing, or there’s some noise, or whatever.
For this part, I use ImageMagick or GraphicConverter, depending on the kind of problems there are. See my previous post on the topic for some AppleScripts that call ImageMagick to trim the sides of an image.
I sometimes need to clean the background if it’s dark or has dark areas on it. Generally speaking, the process I use in ImageMagick will work pretty well on this and leave text in good shape. Images typically do get affected pretty negatively though, so you again may want to do some manual work if you’ve got an article with just a few images. In this case, I’ll sometimes grab the images from a previous iteration of the page and paste it on top of the newer, poorer quality one.
4. Resize the pages
If you’ve had to edit the individual pages, it often happens that the resulting images aren’t the same size or they don’t have much of a border around the text. ImageMagick to the rescue again.
5. Convert to PDF and OCR
In the end, I really like having my documents as PDFs that I can highlight the text in, so I merge the images into one PDF file and run character recognition on it via tesseract. By this point I’ve also converted the files to grayscale. I’ll re-insert the rare color image by hand before this step. Since I don’t overly compress the images, these PDFs can be a bit bigger than you might normally see. I’m debating adding an option to save the images as JPEG at the end, but I hate throwing away the better image quality. (Hard drives are cheap anyway, right?)
My scripts
On my github page, I’ve got the bash scripts I’ve developed for this. If you’ve got the necessary software installed, they should work for you on a Mac and likely other UNIX flavors as well. Windows users will need to tweak them, I’m pretty sure:
- fix_scans: This one does the heavy lifting on the original PDF or image file(s). It will extract images from a PDF (or multipage TIFF), rotate them (meant for those times when the images are all 90° off), call unpaper, deskew slightly rotated images, clean the background, regularize the size, and give you some other options as well. Run any of these scripts without any arguments to get some brief help text (or just look at the code itself). For every step, the script creates a new directory and saves the new files in it, preserving all the originals in case you need to go back to them. Don’t forget to trash those files when you’re done!
- ocr_images: This one uses tesseract to add text to the images and save them as a single PDF, which is roughly the size of an 8 1/2 x 11” piece of paper (Sorry, rest of the world.) You can select the language of the document as well.
- expand_pages: This is the stand-alone version of the resizing option in fix_scans. I find it really handy to regularize the size on a bunch of files at once, or just to add margins to a single image.
Final tips
- If you work with PDFs regularly, look into pdftk and pdfimages. They’re pretty powerful tools and repay the investment.
- ImageMagick has a steep learning curve, but if you work with images a lot, it’s good to get familiar with it. Fortunately there are a lot of tutorials and Stack Overflow questions out there. Their own docs are good, too. Be sure to use the X11-capable version, so you can preview results without creating files.
Tags - AppleScript - technology - cli - pdf - poppler - pdftk - scanning