de vita sua
a blog
Keep processing those images: tiny TIFFS
by John D. Muccigrosso
I keep posting about these image-manipulating scripts because I keep learning more things about image files and about how imagemagick works. Here’s a post on working with compression.
TIFF Files
A popular image format is TIFF (“Tagged Image File Format”), which the older among us may remember as a kind of standard on early Windows machines. They can use multiple kinds of compression techniques to save space, including lossless ones that maintain all the data (in contrast to jpeg). One of these is very useful for scans of text because it reduces the image to two colors, black and white, and then is able to get a lot of savings from compressing the resultant file. This might not sound like it would be so great for scans of text, especially when you learn that the compression comes from FAXes and you remember what those look like. Turns out though, when the scans are of high enough resolution, it works pretty well. Got some complex images in your file? Color ones? Not so great.
A quick example.
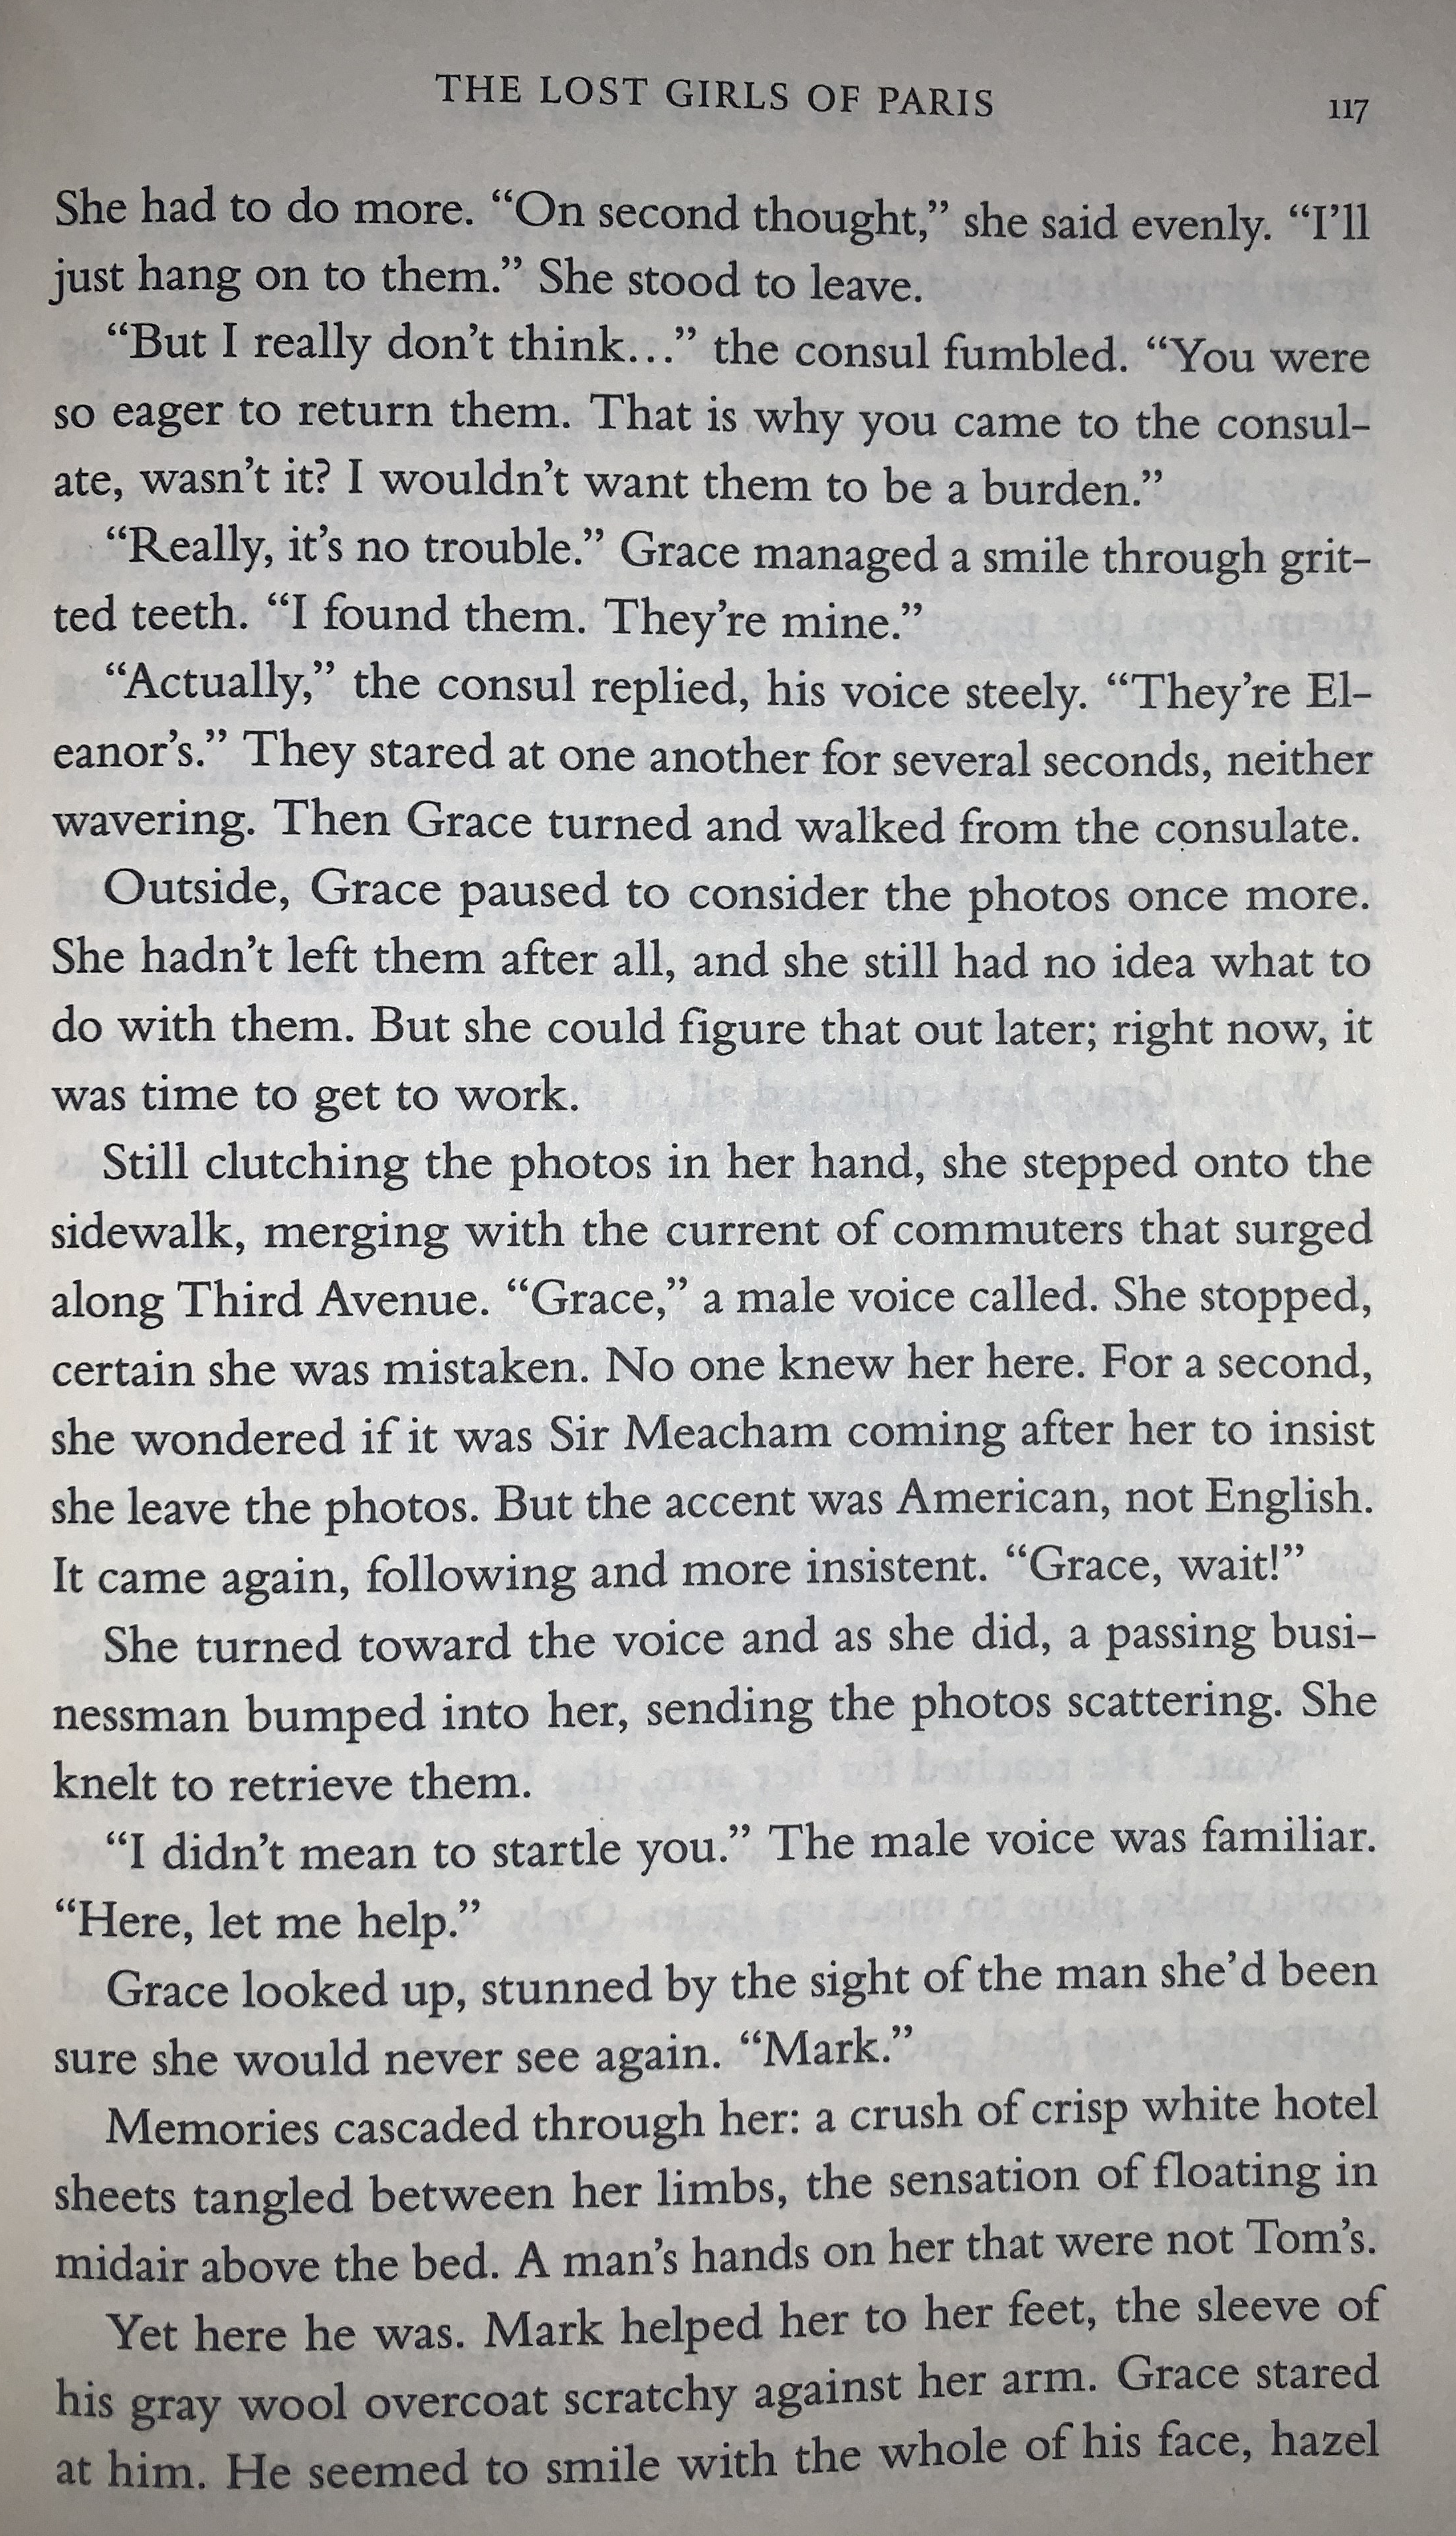
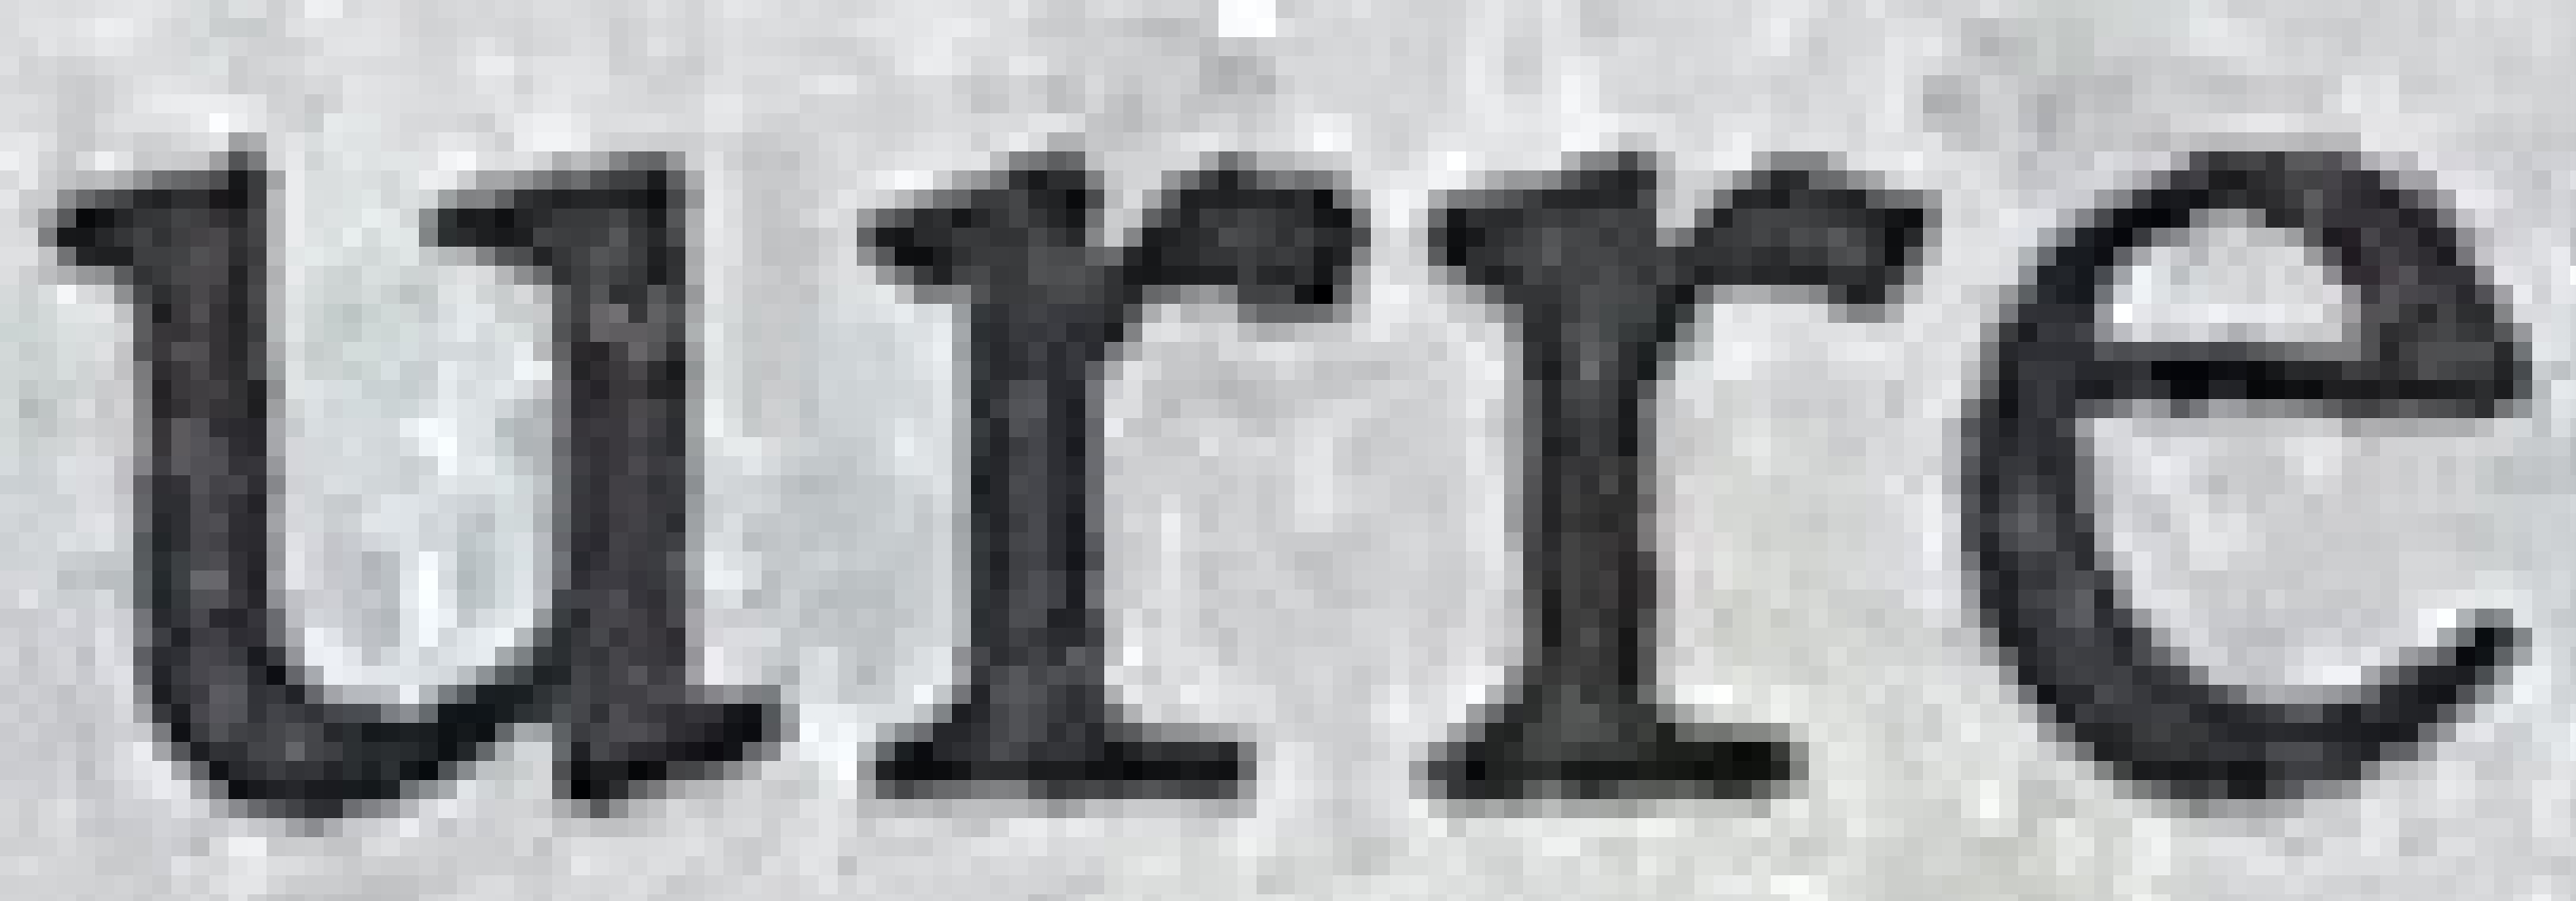
Here’s an image of a page I took with my iPhone, cropped and saved as a png. The text looks pretty smooth at normal viewing size. The next image is a zoomed-in version, where you can see that there are a fair number of pixels per letter (the “r” is about 36 pixels high). (Let’s ignore the crappy contrast from the off-white paper and less-than-ideal photography conditions.)

(Image by John D. Muccigrosso CC BY-NC-SA 4.0)

(Image by John D. Muccigrosso CC BY-NC-SA 4.0)
ImageMagick’s identify function tells me this about the original:
> identify -format "%f %wx%h %xx%y %C %k %r %B" original_text.png
original_text.png 2191x3815 72x72 Zip 15169 DirectClass sRGB  10434584
It measures 2191x3815 pixels at 72x72 pixels per inch (that’s the default when nothing is assigned; it’s actually over 500), uses zip compression, has 15,169 colors, uses sRGB colorspace, and is 10,434,584 bytes (10MB) big. Now I will just turn it into a fax-compressed (Group4 in imagemagick) black-and-white file (the white-threshold bit turns 40% lightest pixels into white which takes care of our dingy background):
> magick original_text.png -white-threshold 40% -alpha off -monochrome -compress Group4 -quality 100 fax_text.tiff
Now the same identify command as before yields this:
fax_text.tiff 2191x3815 72x72 Group4 2 DirectClass Gray 76402
Everything is the same except that the file has been compressed with Group4 (again = fax), has 2 colors, is Gray (not color, so those colors are black and white) and only 76k in size. How does it look?

(Image by John D. Muccigrosso CC BY-NC-SA 4.0)

(Image by John D. Muccigrosso CC BY-NC-SA 4.0)
It’s not perfect. There are some white pixels in the middle of the letters from my heavy-handed thresholding, for example, but it is pretty easy to read. OCR works well on it. Here’s the quick output from tesseract:
THE LOST GIRLS OF PARIS 117
She had to do more. “On second thought,” she said evenly. “I’ll just hang on to them.” She stood to leave.
“But I really don’t think…” the consul fumbled. “You were so eager to return them. That is why you came to the consul- ate, wasn’t it? I wouldn’t want them to be a burden.”
“Really, it’s no trouble.” Grace managed a smile through grit- ted teeth. “I found them. They’re mine.”
“Actually,” the consul replied, his voice steely. “They’re El- eanor’s.” They stared at one another for several seconds, neither wavering. Then Grace turned and walked from the consulate.
Outside, Grace paused to consider the photos once more. She hadn’t left them after all, and she still had no idea what to do with them. But she could figure that out later; right now, it was time to get to work.
It runs into some trouble at the end where the curvature of the book confuses it, but again that’s due to my sloppy photography. Turns out we can even make the file smaller and the OCR is still good. A half-sized copy (done with a simple -resize 50% in imagemagick) yields the same text with few exceptions (it actually handles the curve better). Here’s what that looks like:

(Image by John D. Muccigrosso CC BY-NC-SA 4.0)

(Image by John D. Muccigrosso CC BY-NC-SA 4.0)
It’s not quite as good, but certainly a lot more legible than some scans I have in my library. If we’d actually scanned it at 250 dpi to start with, it would look even better.
The Rub
ImageMagick is pretty good about maintaining the characteristics of images when it alters them. For example here are the specs for a few versions of an enlarged version of the built-in rose image:
bigrose.jpg 32727 JPEG
bigrose.png 157412 Zip
bigrose.tif 618504 None
bigrose_c.jpg 3104 JPEG
bigrose_c.png 150867 Zip
I’ve given you two versions of the non-TIFF files, one with regular and one with increased compression. Now let’s do a simple 180° rotation of each of these files:
bigrose.rot.jpg 32792 JPEG
bigrose.rot.png 157158 Zip
bigrose.rot.tif 618504 None
bigrose_c.rot.jpg 3104 JPEG
bigrose_c.rot.png 157158 Zip
If you compare file sizes, you’ll see that they remain pretty much the same, if not identical. Imagemagick doesn’t appear to have altered anything but the orientation.
Now let’s try that for a TIFF with compression (this time I used LZW, so it kept its colors):
bigrose_c.tif 200124 LZW
bigrose_c.rot.tif 618504 None
Oops, the compressed TIFF completely loses its compression and is now the same size as the originally uncompressed version. Turns out that this happens with all forms of TIFF compression.
So this complicates things when working with compressed TIFFs and is something I realized only recently when my files were suddenly tens of times bigger than they were before I started playing with them. Fortunately there’s a switch in imagemagick to tell it to maintain the existing compression when acting on a TIFF: -define tiff:preserve-compression=true, though I wish it just behaved for TIFF like it does for the other formats.
Moral of the story
The lesson for today then is that you should feel free to scan articles with just text or text plus line drawings in black and white, as long as you use 300 dpi or more. Get the scan conditions right and Group4 compression will keep the size down and they’ll still look good to your eye; just watch out if you use imagemagick on those files.
PS I’m editing my imagemagick AppleScripts to be aware of this problem when working with TIFFs.
Tags - AppleScript - cli - technology - imagemagick - scanning