de vita sua
a blog
Exposure Fusion for better on-site photos
by John D. Muccigrosso
Introduction
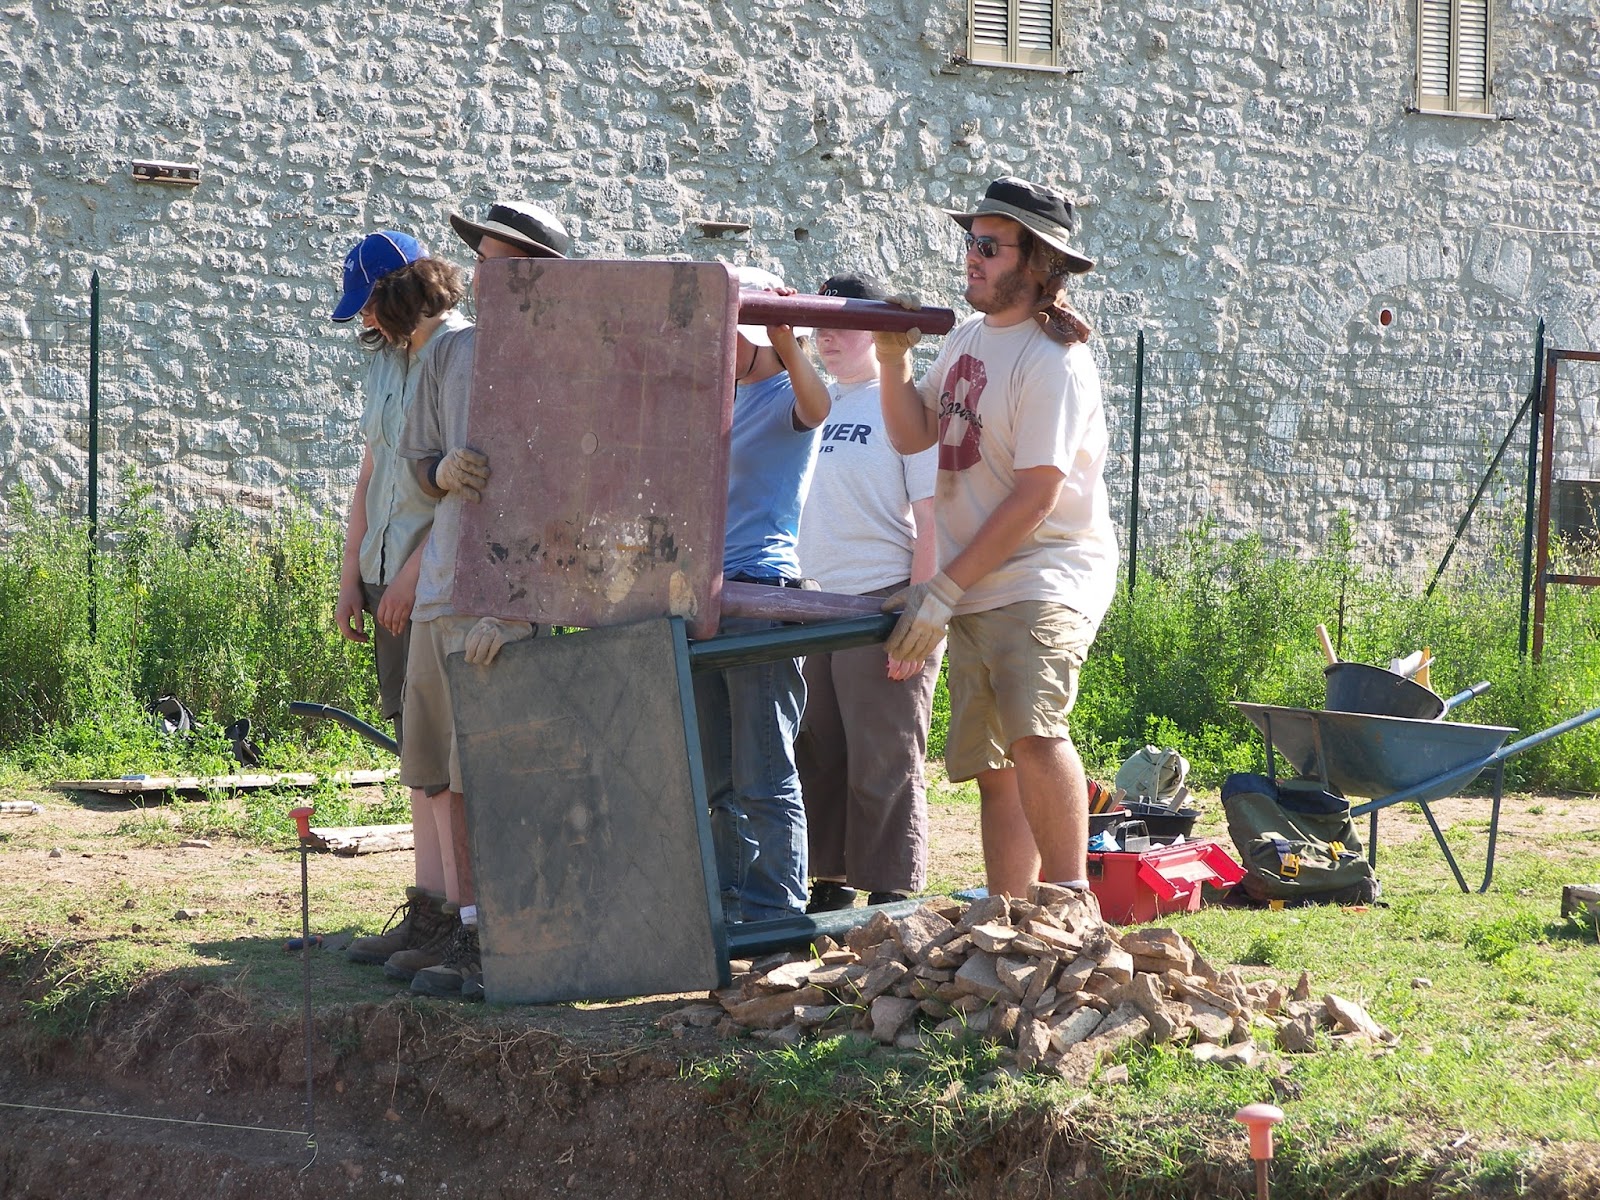 |
| 1. Awkward group of students casting shade. (Image by John D. Muccigrosso CC BY-NC-SA 4.0) |
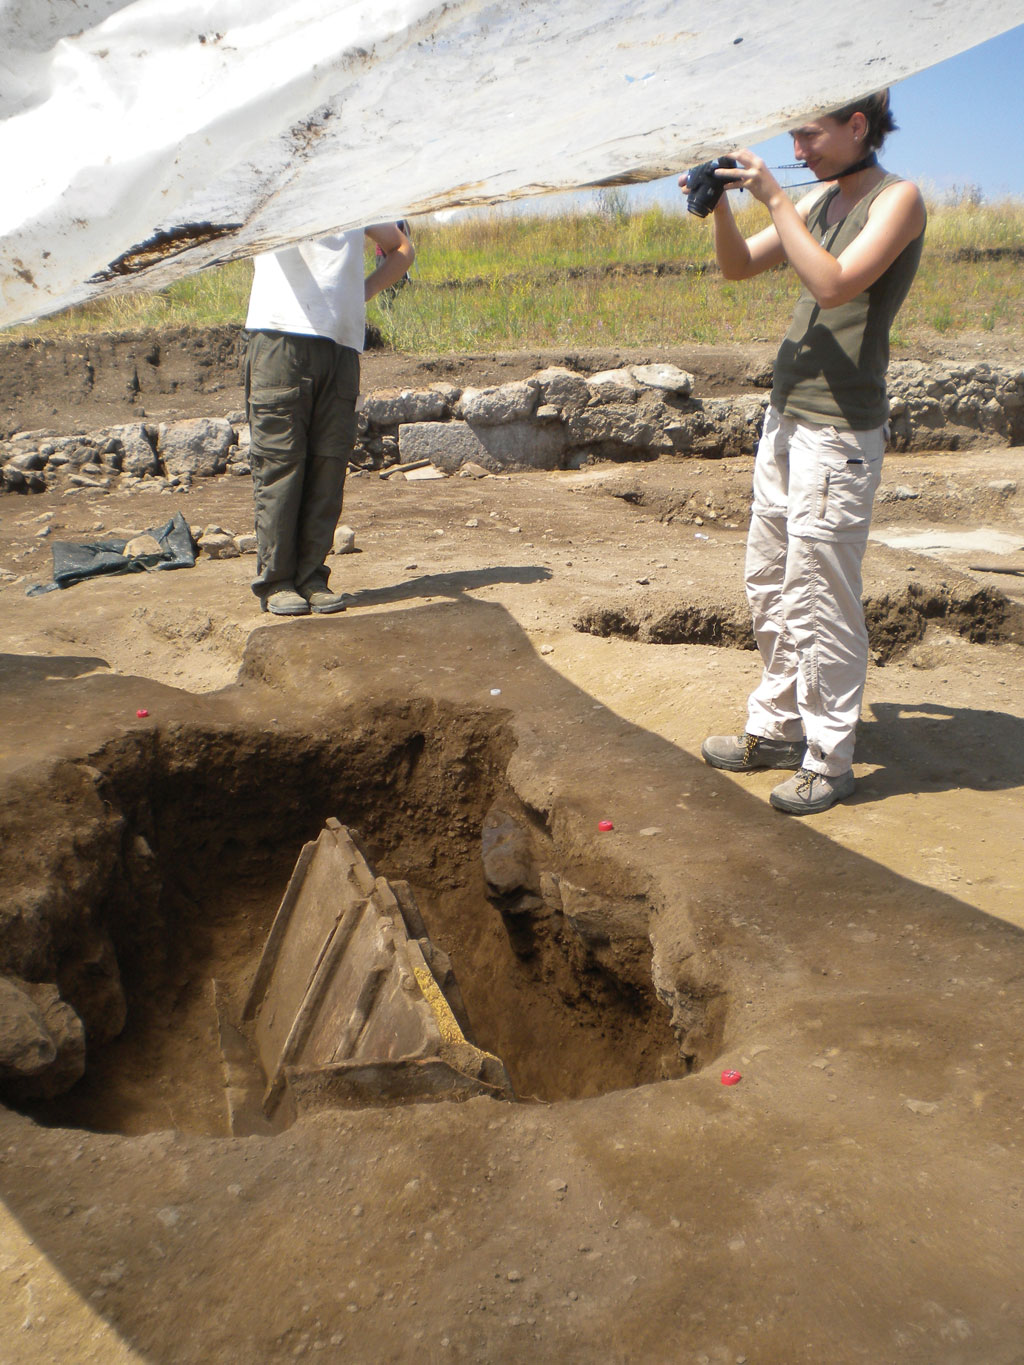 |
| 2. Large plastic sheet(?) used as shade. (Credit Esri) |
 |
| 3. Reflector used for casting shade. (Credit Kate Devlin) |
The Problem
Let's look at what the actual problem is.Detection
Any light receptor has a range of brightness that it can detect. Any values beyond a certain brightness register the same maximum value ("white") and any below a certain point register the same minimum ("black"). This is called the dynamic range of the detector, or, more typically in photography, its exposure range. In the photography world, this range is measured in stops, which work in a base-2 log system, so that for every one-stop change, the value either doubles or halves. If you're handy with a camera, you'll be used to this because exposure times, f-stops, and ISO are all traditionally adjusted in increments of one stop...or so: note how shutter speeds are (were?) given as fractions of a second: 1/125, 1/60 (not twice 1/125), 1/30, 1/15, 1/8 (not twice 1/15), 1/4, 1/2, 1, and so on. (Camera buffs should note that 1 EV is equal to one stop.)What's the range of common detectors? Well, the human eye is pretty good at this. It can detect a total range of something like 46.5 stops, which equates to the brightest thing being one hundred trillion (100,000,000,000,000:1) brighter than the darkest. That range covers the brightest daylight all the way to dimly lit nightscapes, and the eye accomplishes this remarkable feat by constantly adjusting to changing light levels. In daylight the range might be more like ~20 stops (or 1,000,000:1), but some sources say it's more like 10-14 stops (1,000:1 - 16,000:1). In any case, it's pretty big, but remember that this large range can't all be successfully detected at the same time.
Camera print film (remember that?) has an exposure range of approximately 10-14 stops, which is comparable to the human eye. Normal digital DSLRs can do 7-10 stops (128:1 to 1000:1), which is less than the eye. Slide film is lower still at 6-7 stops, and digital video is even lower at ~5.5 stops (45:1).
Recreating
How about output devices? If your camera can record 10 stops, how many stops can whatever is displaying the photo show? Remarkably (to me, anyway), paper can only do about 6-7 stops, which is about 100:1. The computer screen you're likely reading this on does a lot better at something up to 10 stops (1000:1). High dynamic range (HDR) monitors do a lot better at ~14 stops (30,000:1).The situation gets a little more complicated with digital files, because of computational techniques that are applied to the data. The detector in the camera is like a grid (I'm oversimplifying here), and each cell in the grid is a pixel. so the camera hardware has to measure the light hitting the pixel and write that number to a file. For simplicity, think about a gray-scale image: the camera writes the light intensity as a number from 0 to whatever it goes up to. One wrinkle is that some image-file formats can't handle the same dynamic range as the camera's detector. If you're old enough to remember working on monitors with limited output (like the original Macs that had a dynamic range of 2, so pixels were either black or white), you'll know what this does to images. Since image files are binary formats, they tend to work in powers of 2, like the stops, so it's easy to go from the number of bits used to record light intensity to the number of stops. An 8-bit image has 256 levels of brightness, like 8 stops. The common format of JPEG is an 8-bit format (and "lossy" due to compression of the image), but it can achieve dynamic ranges up to about 11 stops due to non-linear transformation of the data coming off the camera detector (another wrinkle). If your camera can save raw files, those will typically have the maximum dynamic range that your camera can measure.
(I'm ignoring a lot of nuance to everything I just wrote about, but it's easy to immerse yourself in the details of this stuff, if you like.)
What's the problem again?
Back to the problem...Like your eye, almost all cameras will make adjustments to maximize picture quality. Cheap ones do it automatically and don't let you make any changes, and more expensive ones will let you control just about everything. Insofar as they adjust then, cameras are like your eye. The problem is, they lack your brain which does a lot of heavy lifting in the background as your eye moves around the scene and adjusts, and an image taken by a camera has to be taken at only one setting. If the dynamic range of the image exceeds that of the camera, then part of the image will either be too dark or too light, and thus all the various shades of "too dark" will be black and the "too light" all white, even though the scene might have looked fine to your eye.
This happens a lot in indoor photos, where there's a window in the background (like this quick shot of my office I just took). The bookshelves look nice, but large portions of the window are over-exposed and therefore white, even though when I look out the window I can see the details of the tree out there.
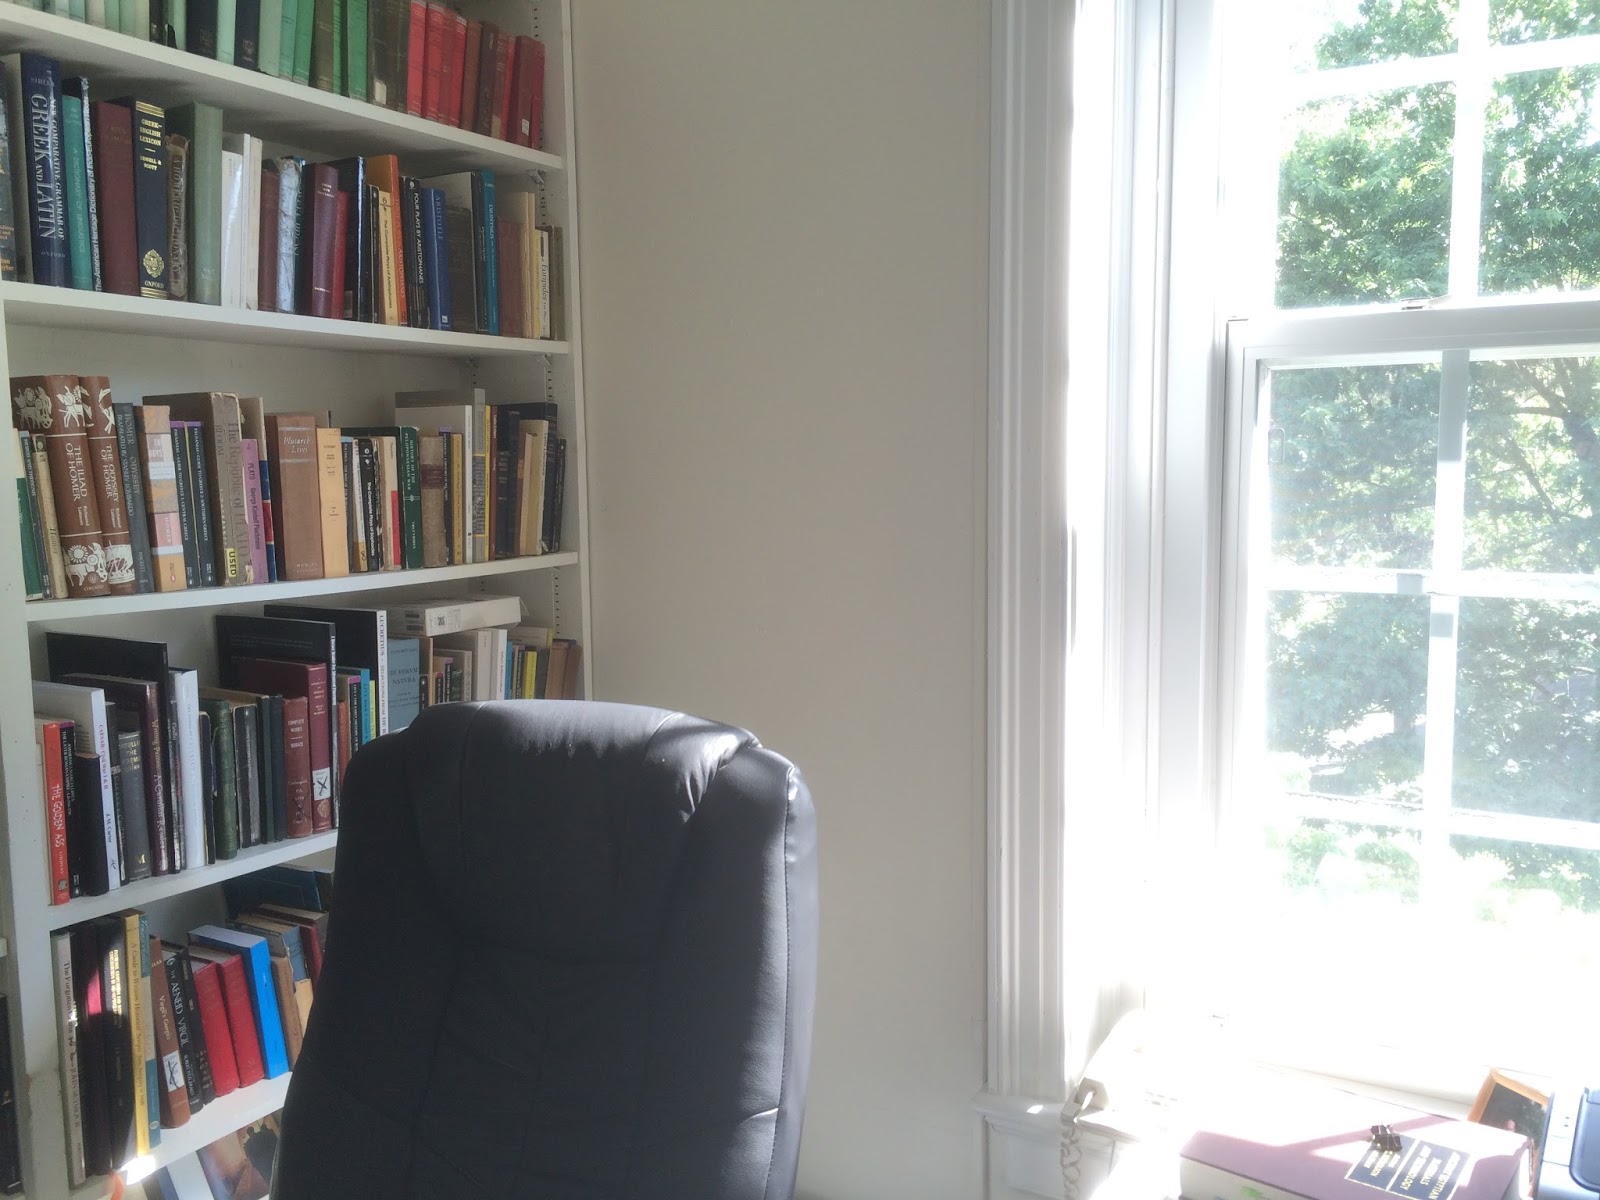 |
| My office with an over-exposed window. (Image by John D. Muccigrosso CC BY-NC-SA 4.0) |
Exposure fusion
The basic idea then is to combine multiple images so that the resulting image has the best exposed parts from each. Fortunately the software is out there to do the combining (or "fusing") automatically, so all you need is a set of appropriate pictures. In this case "appropriate" means images that range from very bright—where the darkest parts of the image don't register as completely black and have some detail in them—all the way to very dark—where the lightest parts of the image don't register as completely white and have some detail in them. You'll want at least one photo in the middle too. For example, the photo of my office is pretty good on the too-bright side. There's not a lot of contrast in the black of my chair and the books, but I don't think they're registering completely black either. I can easily check that with the histogram function in my image-editing software (Graphic Converter) which provides a plot of how many pixels in the image are at what level of brightness. (Histograms are a pretty standard feature of most image editors, including Mac OS X's standard Preview.) |
| Histogram of the over-exposed office photo. |
The horizontal axis represents brightness level and goes from black on the left to white on the right. As you can see, this image has no pixels in the darker region on the left, and a lot in the very brightest on the right, confirming my guess that this would be a good "too bright" image.
- Use a tripod. You want to minimize the difference between the views in each image, so the software can more successfully combine them. You could try standing really still, and you might get decent results that way, but a tripod will keep the camera steady for sure.
- Take at least three photos. In most cases three will be enough (and you can get back to work on the site!). Your camera's histogram can help determine whether the photos are going to work well for this.
- Use exposure time to vary the amount of light, instead of varying the aperture size, which can affect the depth of field and so make the photos less similar.
- Take photos at least 2 stops to either side of the camera's automatic settings. This will be enough for most scenes, but you may find (as we will below) that scenes a larger range of brightness may need a bigger exposure range on the camera. (Here's where the histogram can show whether the photos have a wide enough range.) Many more expensive cameras as well as some cheaper ones can take a series of photos with the desired change in exposure automatically via their "exposure bracketing" function. Turn this on and when you press the button the camera will take one photo at the its automatic setting, one a fixed number of stops darker than that, and finally a third that same number of stops brighter. If you set the bracketing to go 2 stops in each direction, you'll get the desired range of 4. (The following photos were taken with a cheap Canon camera, which doesn't do exposure bracketing out of the box, but can with the free "Canon hack development kit" (CHDK) which adds scripting and a whole bunch of functionality to Canons.)
- If you're using an automatic process on the camera, set a short timer (2 seconds is a common one), so that any residual motion from your pushing the button will have stopped. Alternatively, if you have a remote control, use that instead.
An Example
My backyard provided the scene for this test case. It has an unusually wide dynamic range with a white garage in full sun and some heavily shaded grass.Getting the images
Here are the three photos I started with, along with their histograms. They have a range of 4 stops: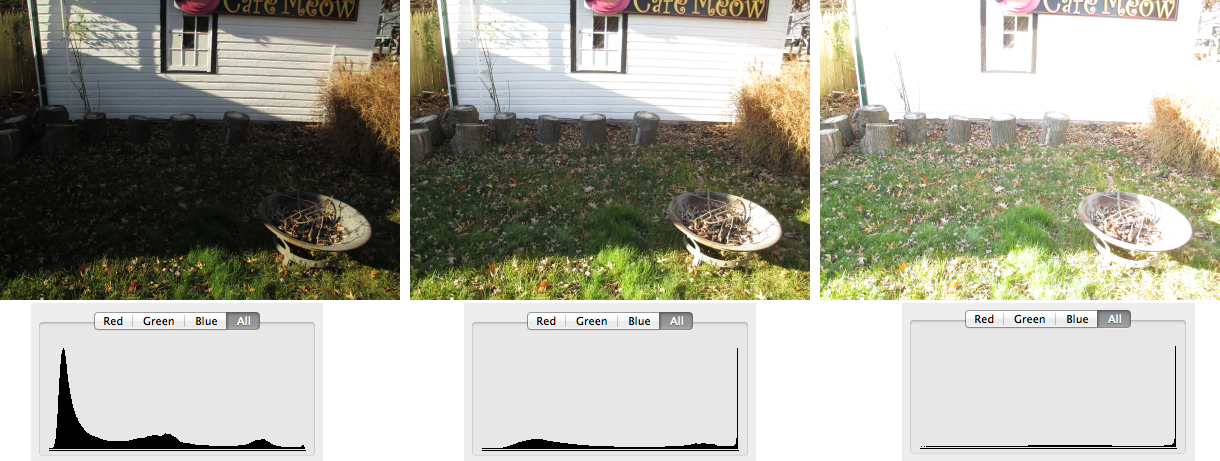 |
| Three photos with a range of 4 stops. (Image by John D. Muccigrosso CC BY-NC-SA 4.0) |
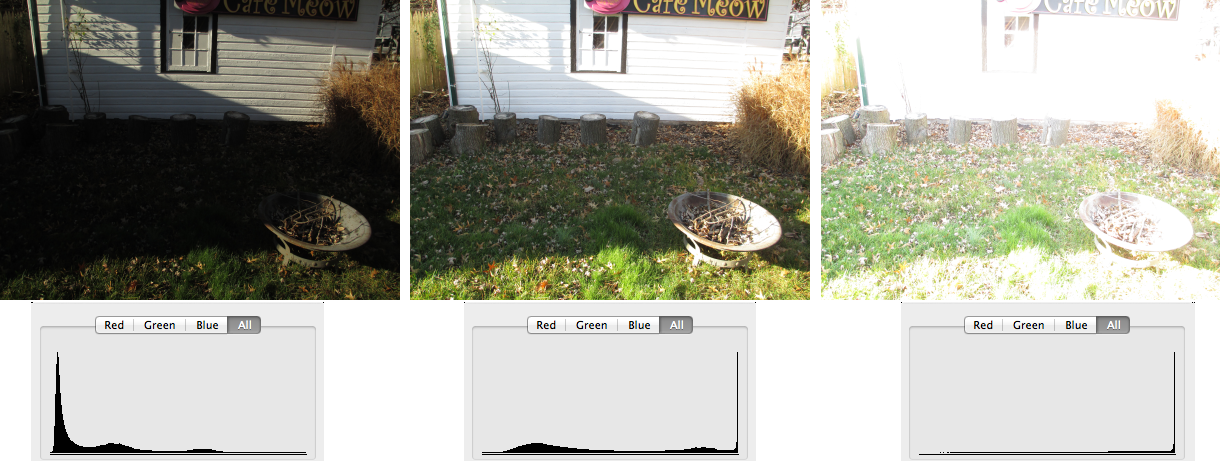 |
| Three photos with a range of 6 stops. (Image by John D. Muccigrosso CC BY-NC-SA 4.0) |
You can see the the darkest image now has no pixels anywhere near the maximum brightness (and still very few at the maximum darkness). The bright image of course has even more washed-out areas, but it also has a lot more detail in the darkest parts too.
Fusing the images
Now that I have the images, they need to be combined. There are some commercial and free software applications out there that can do this for you. I use a free one, Hugin. (I've written about using Hugin before.) Hugin is designed to be a panorama maker, but making those requires a number of steps, including ones that do what we want here. While you can actually load up your photos into Hugin and use its graphical interface to do this (here's a tutorial), I'm going to break out the command line and directly access the underlying software goodness.There are two applications to use from the command line. The first aligns the images and the second does the exposure fusion. Since I used a tripod, that first app really shouldn't have much to do, but I want to make sure that there are no problems with alignment, so I'm going to run it anyway. The app is rather straightforwardly called
align_image_stack, and I use it with the -a option that tells it to align the images and save them to a series of similarly named tiff files. Once that's done, I use enfuse to do the fusing. Normally both processes take only a few minutes on my aging laptop. (As usual both applications can accept other parameters that modify how they work; I'm just keeping it simple here. RTFM for those details: enfuse and align_image_stack.) The exact commands (on my Mac) are (and ignore the leading numbers):1> cd <directory of image files>
2> /Applications/Hugin/Hugin.app/Contents/MacOS/align_image_stack -a <newFileName> <list of existing image files>
3> /Applications/Hugin/Hugin.app/Contents/MacOS/enfuse -o <final filename> <list of files from previous step>
4> rm <intermediate files>
Here's what each command does:
- Change the working directory to the one that holds the images I want to fuse. Normally I keep each set of images in its own folder. That's not strictly necessary, but it makes some things easier and it's certainly more organized.
- Run align_image_stack on the images I want to work with. Since I'm in a directory without a lot of other stuff, I can often use a wildcard here:
align_image_stack -a newFileName image*.tif. The newFileName is what the output files will be called. align_image_stack will automatically give them an extension of "tif", so you don't need to include one, and it will also suffix a number to this name, yielding, for example, "newFileName_0000.tf" as the first file. This process runs fairly quickly since the images were really already aligned, thanks to the tripod. When it's done, you'll see the new files in the directory. - Run enfuse on the intermediate files. Again wildcards come in handy, so I typically give the intermediate files from step 2 a name different from the originals, like "aligned_image".
- Finally delete the intermediate aligned files from step 2.
The Result
Here's what the final image looks like (I turned the output tif into a jpeg to keep the download size reasonable):And here's the histogram for that:

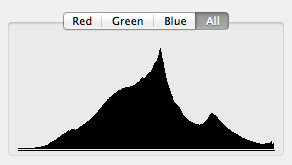 |
| Histogram of final output image |
Isn't this just "HDR"?
You'd think that, strictly speaking, high-dynamic-range images (HDR) would be images that have a greater than usual dynamic range, just like HDR monitors can produce a greater dynamic range than "normal" monitors. That might mean an image with more than the typical 10 stops your camera can capture. HDR can mean that, but what's usually meant is the result of taking such an image (often generated using techniques similar to exposure fusing) and manipulating it so that it can be viewed in a non-HDR medium (like a piece of photographic paper or your normal computer screen). This process is called tone mapping, and involves, as the Wikipedia page on HDR says, "reduc[ing] the dynamic range, or contrast ratio, of an entire image while retaining localized contrast." Depending on the algorithms used, this process can create vivid alterations in color and saturation, and give the image an artificial look. Such extreme applications are fairly popular these days, and probably what most people think of when you say "HDR".But exposure fusion doesn't involve the creation of an HDR image with the subsequent tone-mapping, so it avoids the sometimes interesting effects you can find in some HDR photos. In fact the original paper on exposure fusion was called "Exposure Fusion: A Simple and Practical Alternative to High Dynamic Range Photography" (Mertens, T., J. Kautz, and F. Van Reeth. 2009. “Exposure Fusion: A Simple and Practical Alternative to High Dynamic Range Photography.” Computer Graphics Forum 28 (1): 161–71. doi:10.1111/j.1467-8659.2008.01171.x). That said, it is possible to use tone-mapping techniques that create images that look very similar to ones obtained from exposure fusion. The popular HDR mode on the iPhone seems to do this. (I haven't found a definitive statement on exactly what the iPhone does, but it's certainly taking multiple photos and combining them.) Here's a site comparing the two techniques. When you look at the histogram for our final image above, you can see that this is really a low-dynamic-range process.
Conclusion
So there you go. Next time you've got a scene with a very high dynamic range (which usually means some shadow on a sunny day) that you can't fix by other means, break out the tripod and your camera's bracketing mode and do some exposure fusion.There's also a lot of information out there about this and other post-processing techniques (like HDR) that can improve your photos. You'll find that similar fusion techniques can be used for combining series of images with other variants, like creating large depths of field.
Tags - AppleScript - archaeology - Google - technology